

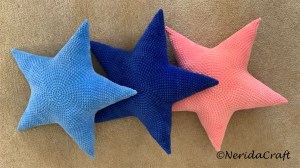
A few months ago I posted on crocheted star pillows I made;
today I finished the pattern for the Moon pillow as well. 😊 It’s actually much easier than the stars, and can be done pretty fast.

I used the same yarn, Himalaya Dolphin Baby, as for the stars, and a 4.5 mm crochet hook.
Size: cca 30 cm
Yarn: Himalaya Dolphin Baby (100 polyester; 100g – 120mt/131 yds; hook size 4.5 mm)
Stitches used and abbreviations (US):
- slst: slip stitch
- sc: single crochet
- sc inc: single crochet increase – make 2 sc’s in the same stitch
- sc dec: single crochet decrease (for this type of yarn better to use normal decreases not the invisible one)
Pattern instructions:
Work in rounds, in a spiral form continuously.
R1: ch 2 and make 8 sc in 2nd stitch from hook (8 sts) (for this kind of yarn this worked better for me than starting with a magic ring)
R2: 8 sc inc (16 sts)
R3: (1 sc, sc inc) x 8 (24 sts)
R4: (sc inc, 2 sc) x 8 (32 sts)
R5: (3 sc, sc inc) x 8 (40 sts)
Now make 2 rounds with 10 increases:
R6: (2 sc, sc inc, 1 sc) x 10 (50 sts)
R7: (1 sc, sc inc, 3 sc) x 10 (60 sts)
From this round, 12 increases are made in each round till the end, increases fall one stitch before the previous increase.:
R8: (sc inc, 4 sc) x 12 (72 sts)
R9: (5 sc, sc inc) x 12 (84 sts)
R10: (4 sc, sc inc, 2 sc) x 12 (96 sts)
R11: (3 sc, sc inc, 4 sc) x 12 (108 sts)
R12: (2 sc, sc inc, 6 sc) x 12 (120 sts)
R13: (1 sc, sc inc, 8 sc) x 12 (132 sts)
R14: (sc inc, 10 sc) x 12 (144 sts)
R15: (11 sc, sc inc) x 12 (156 sts)
R16: (10 sc, sc inc, 2 sc) x 12 (168 sts)
R17: (9 sc, sc inc, 4 sc) x 12 (180 sts)
R18: (8 sc, sc inc, 6 sc) x 12 (192 sts)
R19: (7 sc, sc inc, 8 sc) x 12 (204 sts)
R20: (6 sc, sc inc, 10 sc) x 12 (216 sts)
R21: (5 sc, sc inc, 12 sc) x 12 (228 sts)
R22: (4 sc, sc inc, 14 sc) x 12 (240 sts)
This is how it looks at this point:

Actually it’s finished, leave a long tail, and the last step is to sew the sides together and stuff. Fold it into half (with wrong sides outside), and start to sew the opposite stitches together. (So the first two stitches to use is the next stitch from where stopped, and the last stitch just made.)
For sewing, I used the same yarn, but a thinner worsted yarn (in a matching colour) would be good as well, as this chenille yarn is not the best to sew with.
Do not sew it completely closed, leave a hole, turn it out (to have right side out), stuff, and sew together the reamaining part. Add some more stuffing continuously when closing the hole, and shape. Fasten off, leave the end of the yarn inside the moon.

Cheers,
Judit

Where can i find your pattern for the cloud pillow please and Thank you.
LikeLike
Hi! The cloud pillow and the pattern you’ll find here:
https://neridacraft.com/2021/01/18/cloud-pillow/
Thank you, Judit
LikeLike
Approximately how big does this pillow end up being?
LikeLike
Thank you!!!!💗💗💗
LikeLike