

These pillows had been on my (quite long) to-do list for a long time. I finished them a few months ago, and since then these pillows are the kids’ favourites.😊
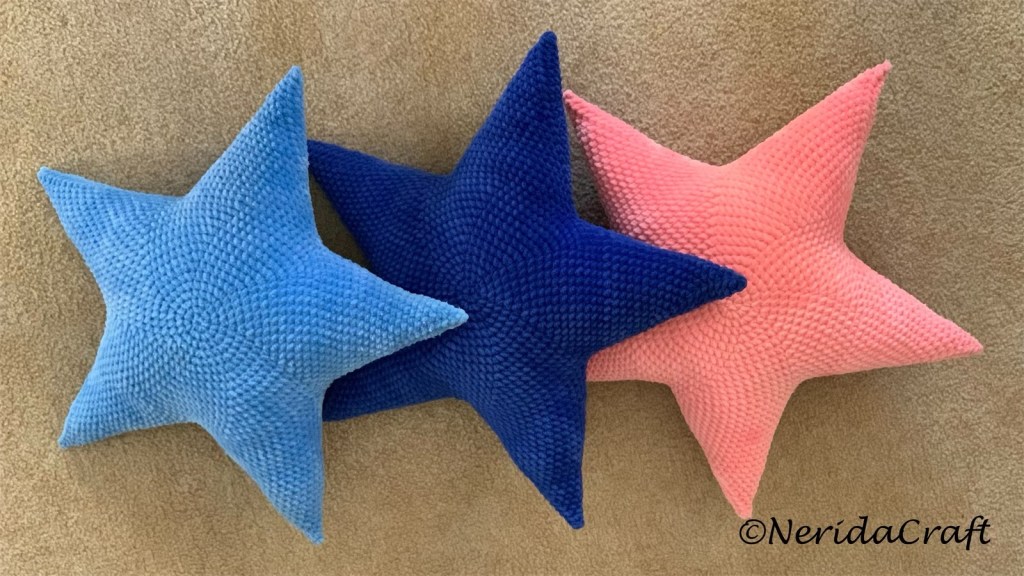
I used yarn “Himalaya Dolphin Baby”, and this was the first time I tried this type, a micro-polyester chenille yarn. I really enjoyed working with it, it’s easy and feels like you proceed faster.I’m sure I’ll use this yarn more often in the future.😊
My only problem was that this type of chenille yarn tends to lose it’s quality if you have to fix any mistakes and go back to a previous row. And that happens when you’re trying to design and find out how to crochet a star like that.😊 So while working with this type of yarn, always count, check the work, and try to avoid ripping out stitches to repair errors. The small chenille parts this yarn is covered with (those make it really soft) tend to come down if you rip out stitches too many times, therefore I think this type of yarn is not really ideal to reclaim either. But it worths to try as the end result is phantastic!😊
Yarn: Himalaya Dolphin Baby (100 polyester; 100g – 120mt/131 yds; hook size 4,5 mm)
Hook size: 4,5 mm
Size: diameter cca 30 cm
Stitches used and abbreviations:
- slst: slip stitch
- sc: single crochet
- sc inc: single crochet increase – make 2 sc’s in the same stitch
- sc dec: single crochet decrease (for this type of yarn better to use normal decreases not the invisible one)
Pattern instructions
Work in rounds, continuously, in a spiral form. Starting from the middle, first make 2 circles (R1 – R15), than crochet them together while doing the stair points.
R1: ch 2 and make 7 sc in 2nd stitch from hook (7sc) (for this kind of yarn this worked better for me than starting with a magic ring)
R2: (sc inc) x 7 (14 sc)
R3: (sc inc, 1 sc) x 7 (21 sc)
R4: (sc inc, 2 sc) x 7 (28 sc)
R5: (sc inc, 3 sc) x 7 (35 sc)
R6: (sc inc, 4 sc) x 7 (42 sc)
R7: (sc inc, 5 sc) x 7 (49 sc)
R8: (sc inc, 6 sc) x 7 (56 sc)
R9: (sc inc, 7 sc) x 7 (63 sc)
R10: (sc inc, 8 sc) x 7 (70 sc)
R11: (sc inc, 9 sc) x 7 (77 sc)
R12: (sc inc, 10 sc) x 7 (84 sc)
R13: (sc inc, 11 sc) x 7 (91 sc)
R14: (sc inc, 12 sc) x 7 (98 sc)
R15: (sc inc, 13 sc) x 7 (105 sc)
When finished with the first circle, close with an slst, pull through and cut the yarn. After finishing the second circle, do not cut the yarn, but continue with the first point of the star as shown below.
For both circles, first mark the first and the last stitches of the star points (105 stitches divided by 5 for the 5 star points, 21 stitches each): 1., 21., 22., 42., 43., 63., 64., 84., 85., 105.
Place the circles on top of each other, showing right sides out (so while working you see the right sides). Continue the work with the second circle made with the first star point:
R16 (first point): 21 sc (the stitch markers from stitches 1 and 21 can be removed), 21 sc to the first 21 stitches of the other, first cirle made (those 2 markers can be removed now too); continue the work on these 42 stitches made in the next rounds (42 sc)
R17: 20 sc, sc dec, 19 sc, sc dec (the second sc of the decrease here is the first sc of the previous row) (40 sc)
From this point make 2 decreases every row, and the first sc to decease is always the sc dec stitch from previous row.
R18: 19 sc, sc dec, 18 sc, sc dec (38 sc)
R19: 18 sc, sc dec, 17 sc, sc dec (36 sc)
R20: 17 sc, sc dec, 16 sc, sc dec (34 sc)
R21: 16 sc, sc dec, 15 sc, sc dec (32 sc)
R22: 15 sc, sc dec, 14 sc, sc dec (30 sc)
R23: 14 sc, sc dec, 13 sc, sc dec (28 sc)
R24: 13 sc, sc dec, 12 sc, sc dec (26 sc)
R25: 12 sc, sc dec, 11 sc, sc dec (24 sc)
R26: 11 sc, sc dec, 10 sc, sc dec (22 sc)
R27: 10 sc, sc dec, 9 sc, sc dec (20 sc)
R28: 9 sc, sc dec, 8 sc, sc dec (18 sc)
R29: 8 sc, sc dec, 7 sc, sc dec (16 sc)
R30: 7 sc, sc dec, 6 sc, sc dec (14 sc)
R31: 6 sc, sc dec, 5 sc, sc dec (12 sc)
R32: 5 sc, sc dec, 4 sc, sc dec (10 sc)
R33: 4 sc, sc dec, 3 sc, sc dec (8 sc)
R34: 3 sc, sc dec, 2 sc, sc dec (6 sc)
R35: 2 sc, sc dec, 1 sc, sc dec (4 sc)
R36: 1 sc, sc dec, sc dec (2sc)
Make an slst to the next stitch and fasten off.
For the next 3 star points, start from the 2nd stitch marker right from the first star point made. The decreases in the first rows are made to crochet together the star points, they are actually not decreasing the number of stitches, as ‘extra’ stitches used from previous star points made. These are included only to avoid having holes between the 5 star points.
R16 (2nd, 3rd, 4th star points): 20 sc, sc dec (crochet together the last (marked) stitch of the 21 sts of this star point, and the leg of the first stitch in the first row of the previous star point), sc dec (similarly on the other side, crochet together the leg of the last stitch in the first row of the previous star point and the first (marked) stitch of the 21 sts of this star point), 20 sc (42 sc)
R17-R36: same as for the first star point above.
Now only one star point is left, between two star points already made:
R16 (5th star point): sc dec (crochet together the leg of the last stitch in the first row of the previous star point and the first (marked) stitch of the 21 sts of this star point), 19 sc, sc dec (crochet together the last (marked) stitch of the 21 sts of this star point, and the leg of the first stitch in the first row of the previous star point), on the other side similarly: sc dec, 19 sc, sc dec (42 sc)
R17-R36: same as for the first star point above.
Finished!😊

I hope the instructions can be followed, enjoy!😊
Cheers,
Judit

Thank you for sharing your star pillow. I hope I can finish it successfully.
LikeLike
Kedves Judit!
Most találtam rá a mintádra, miután a kislányom a szülinapjára a jövő hétre egy “horgolt plüss csillagot” kért. Elolvasva a mintádat, lenne pár kérdésem:
1. Mennyi fonal kellett a párnához? Egy gombolyag elég volt? (Én nem kaptam Himalaya Dolphin Babyt, csak YarnArt Dolce-t, de elvileg megegyeznek a paramétereik).
2. Jól értem, hogy miután megcsináltam a két kört, utána a 16. sorban úgy kell kezdeni a csillag ‘első ágát’, hogy összeillesztem a két kört, végigmegyek az egyik kör 21 szemén sc-vel, majd megfordítom a két összefogott kört és megcsinálom a másik körön is a szemben lévő 21 szemet sc-vel és ez hozza létre azt a kört, amin utána dolgozom tovább ezen az ágon? (Remélem, sikerült értelmesen megfogalmazni a kérdésemet).
3. Én lehet, hogy kevésbé hegyesre szeretném a csillagok hegyét. Azt hogyan tudnám szerinted megoldani? (Félek próbálgatni, mert nem dolgoztam még sose zsenília fonallal és írtad, hogy nem túl jó dolog visszabontani…)
Előre is nagyon köszönöm a segítségedet!
Kriszti
LikeLike
How do we print patterns?
LikeLike